Digispark
The Digispark is a very simplistic development board. It’s based on the ATTiny85, is Arduino compatible, has a USB-A plug built-in (so no dangling cables!), and it’s very affordable!
The Digispark comes with a keyboard library that allows us to utilize it as a BadUSB.
- Amazon.com affiliate Link: https://amzn.to/3KjGhWq
- Amazon.de affiliate Link: https://amzn.to/3tuJ6xh
Arduino IDE Setup
Section titled “Arduino IDE Setup”Preparations
Section titled “Preparations”- Download and Install Arduino IDE: https://www.arduino.cc/en/software
- Open Arduino IDE
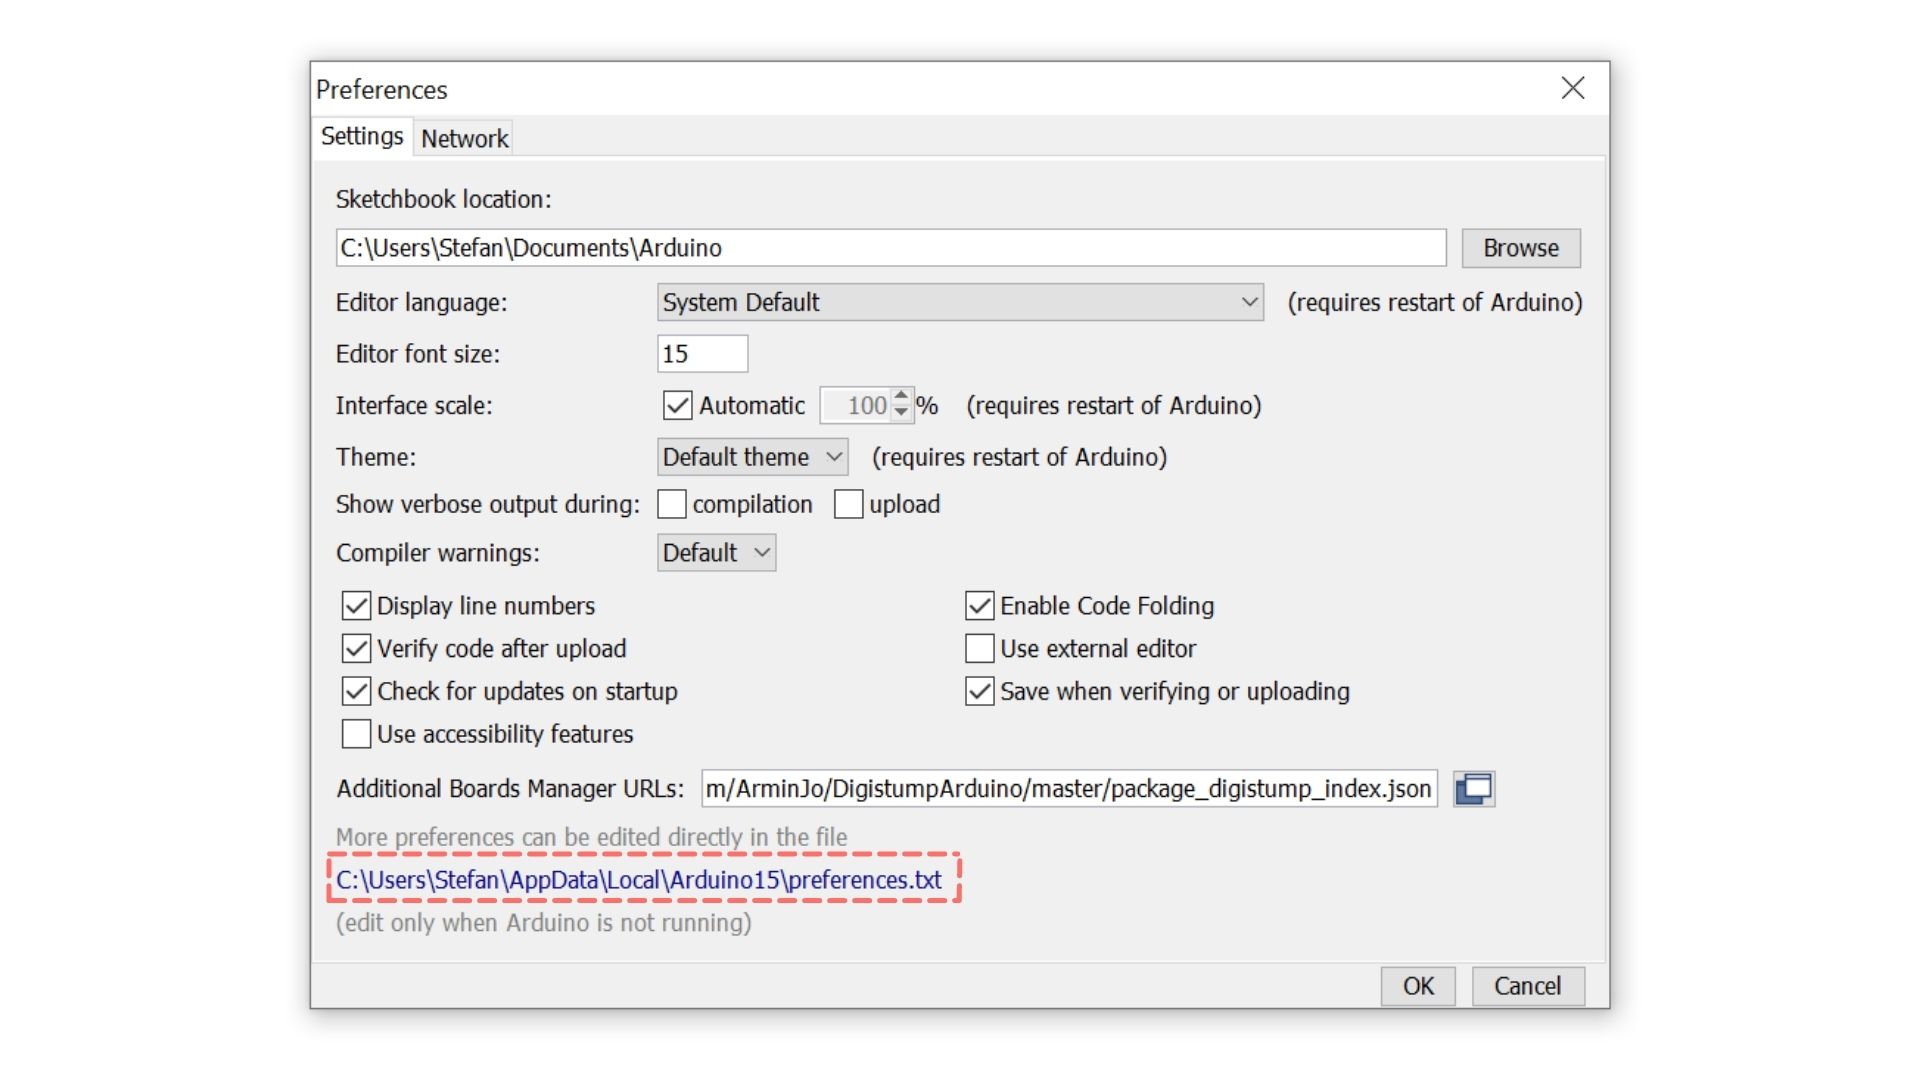
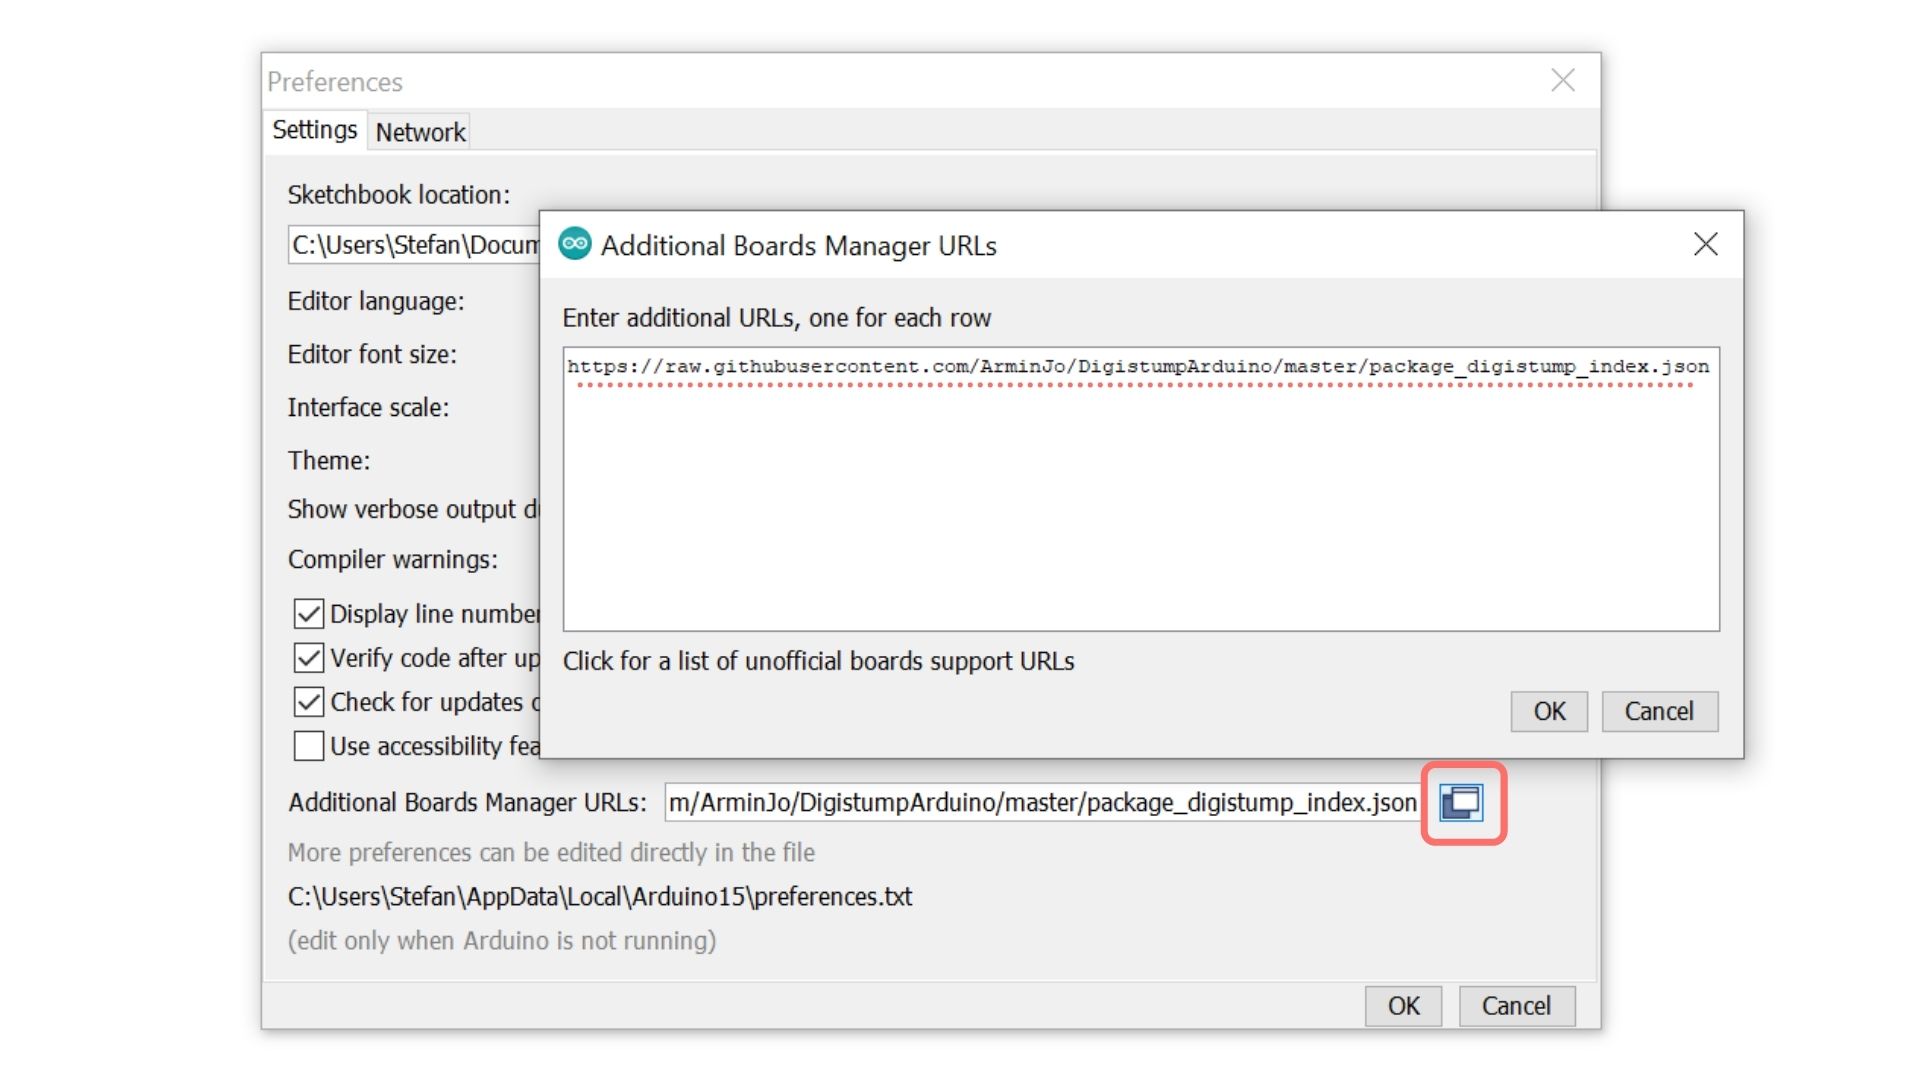
- Go to File > Preferences > Additional Boards Manager URLs and paste
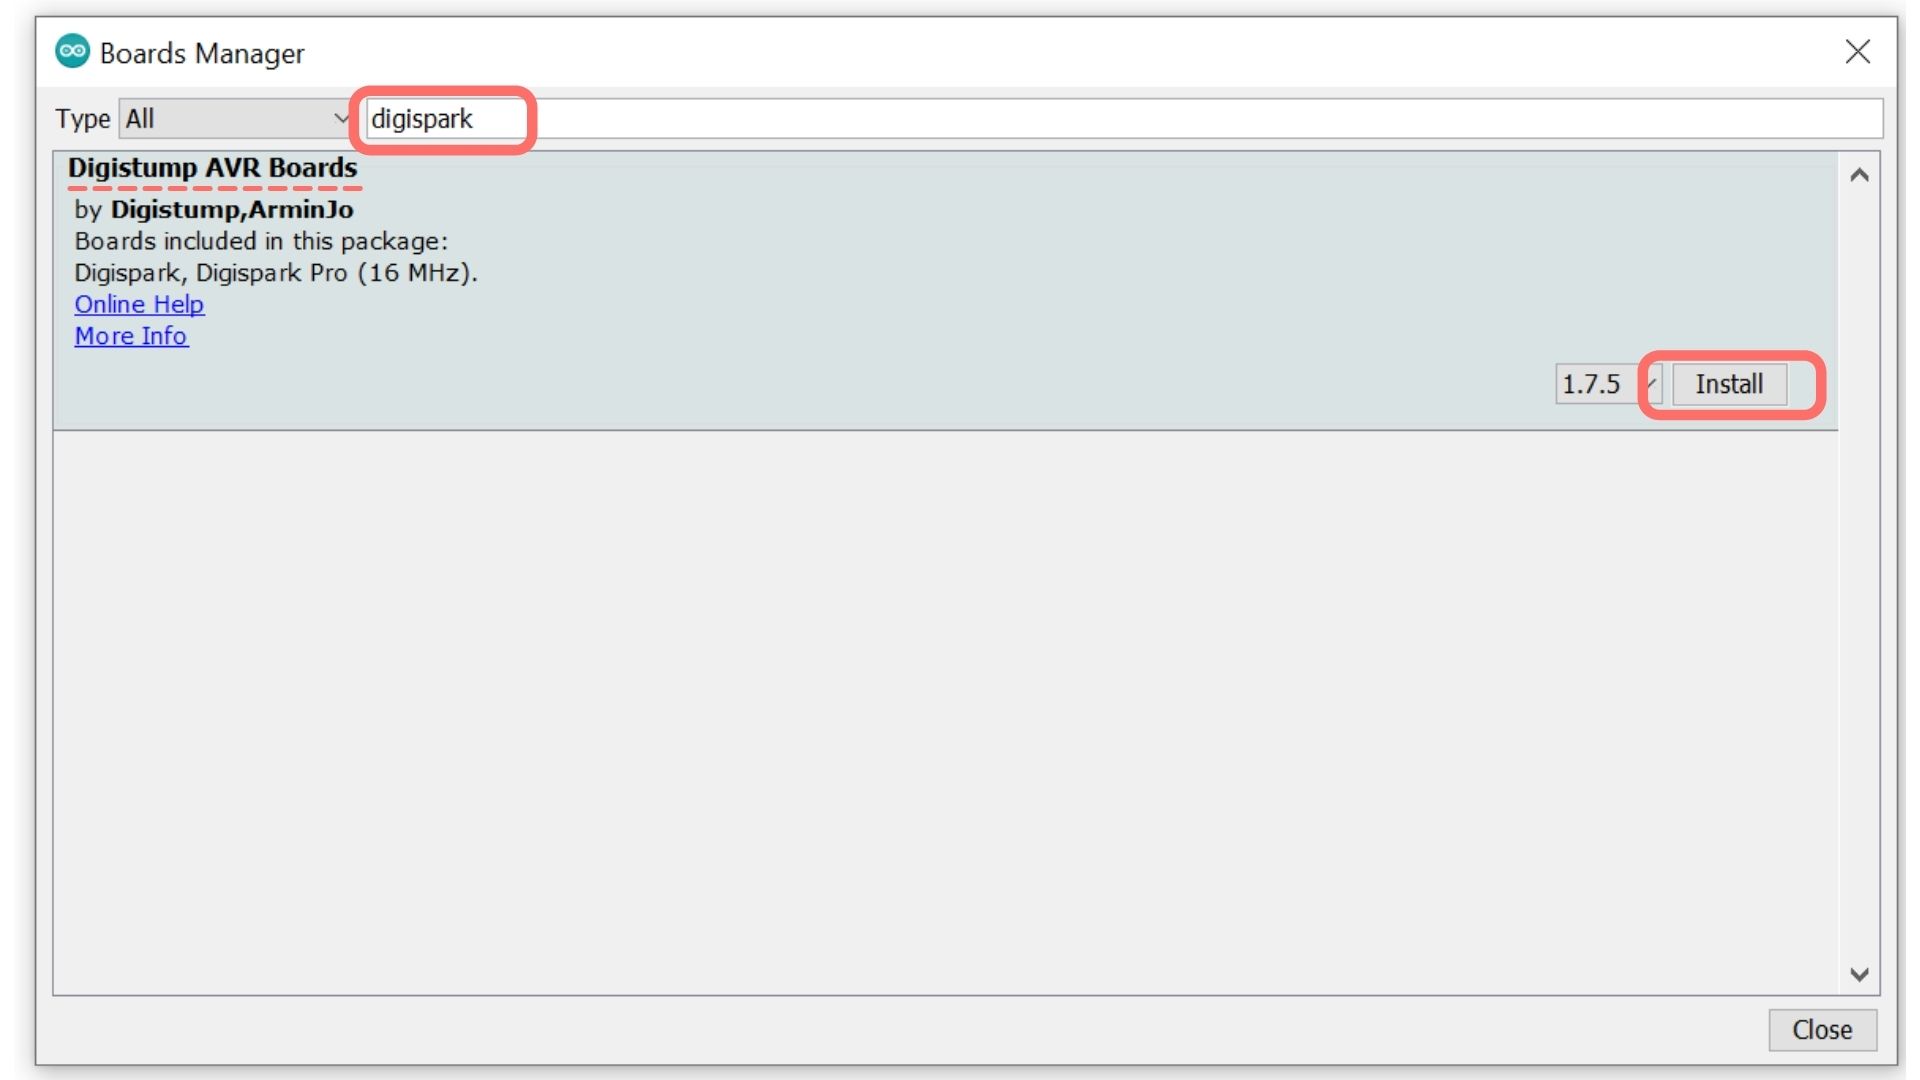
https://raw.githubusercontent.com/ArminJo/DigistumpArduino/master/package_digistump_index.jsonthen click OK to save and close the Preferences - Go to Tools > Board > Boards Manager, search for
Digisparkand install “Digistump AVR Boards”
Uploading your first Sketch
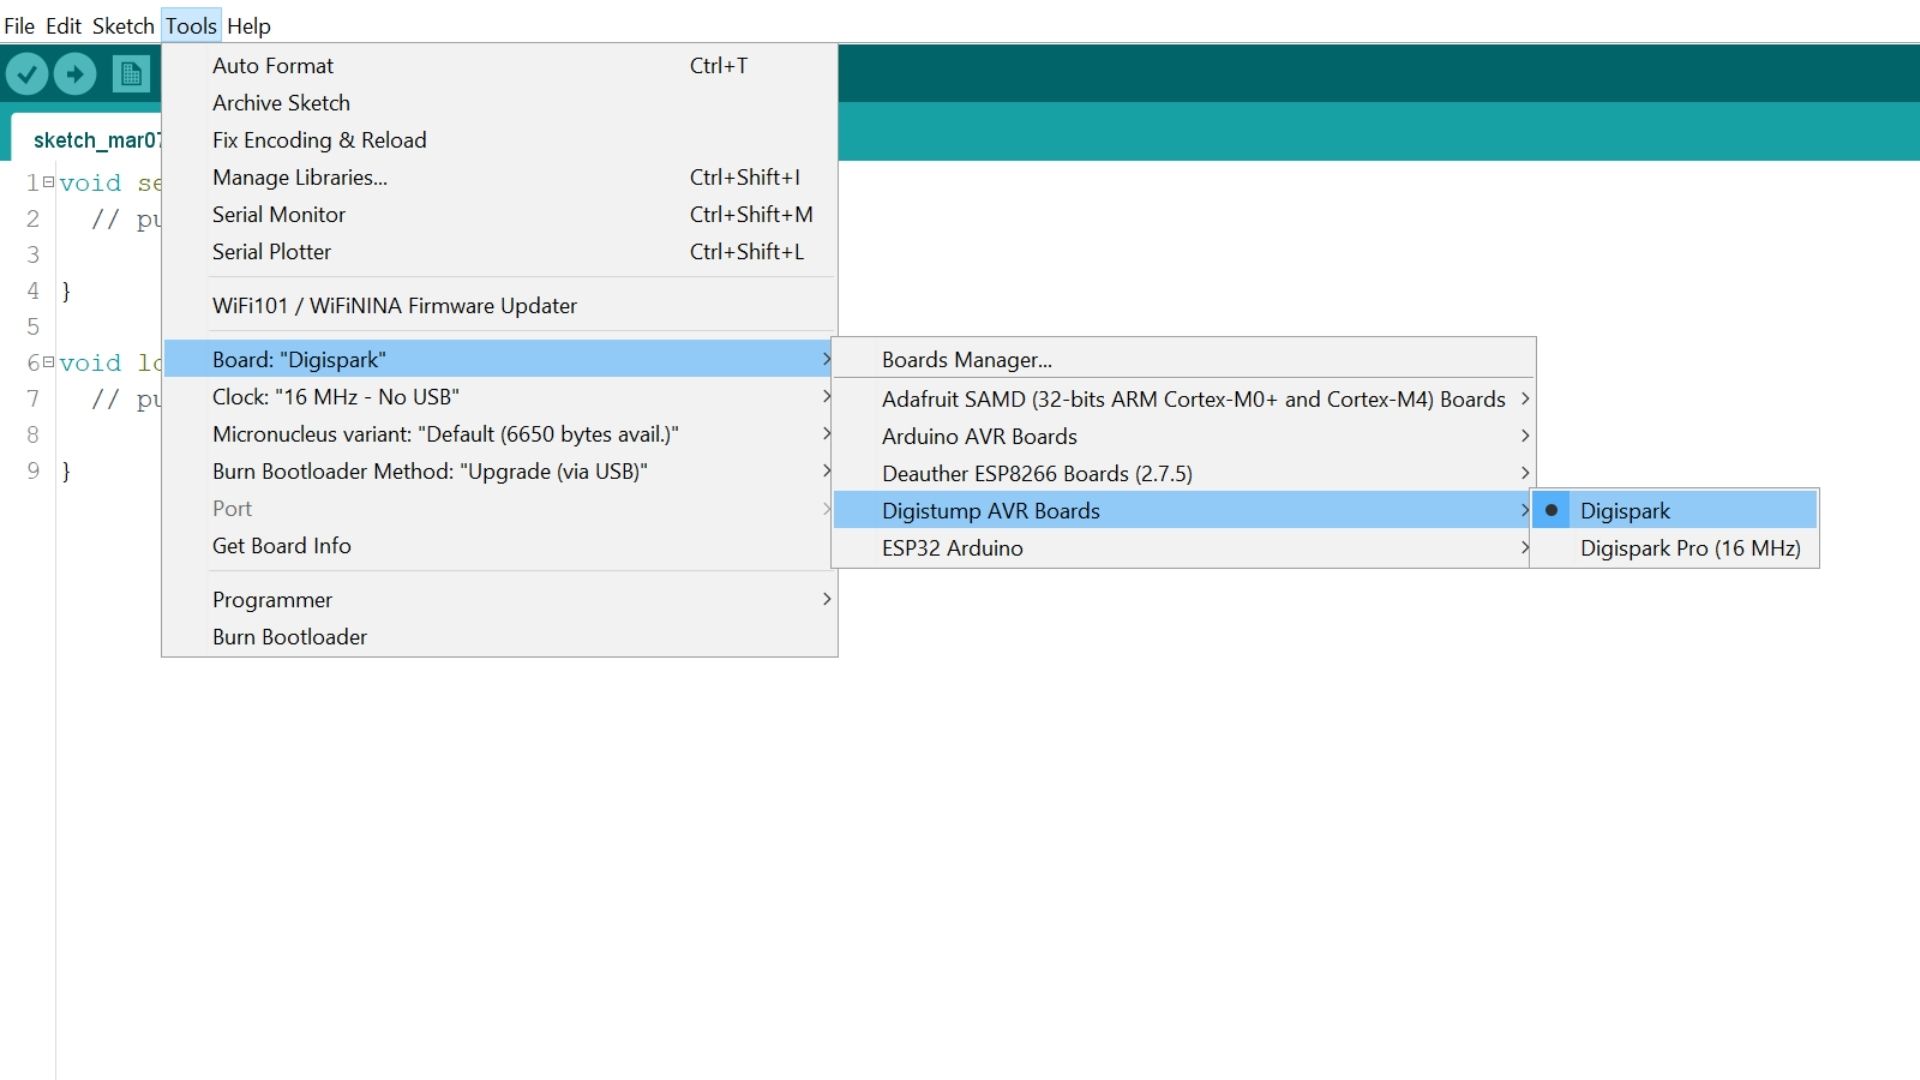
Section titled “Uploading your first Sketch”- Go to Tools > Board > Digistump Boards and select Digispark
- Open File > Examples > Digispark_Examples > Blink
- Click Upload (in the top left)
- Insert your Digispark when told (you’ll see the output at the bottom)
- When done, the LED on your Digispark should now blink
Using it as a Keyboard
Section titled “Using it as a Keyboard”(Go to File > New to create a new sketch).
Here is a simple example that will type Hello World after 5 seconds:
#include DigiKeyboard.h
void setup() {  DigiKeyboard.delay(5000);  DigiKeyboard.print("Hello World");}
void loop() {
}
There is also a built-in example at File > Examples > DigiKeyboard > Keyboard that you can check out.
Duckify
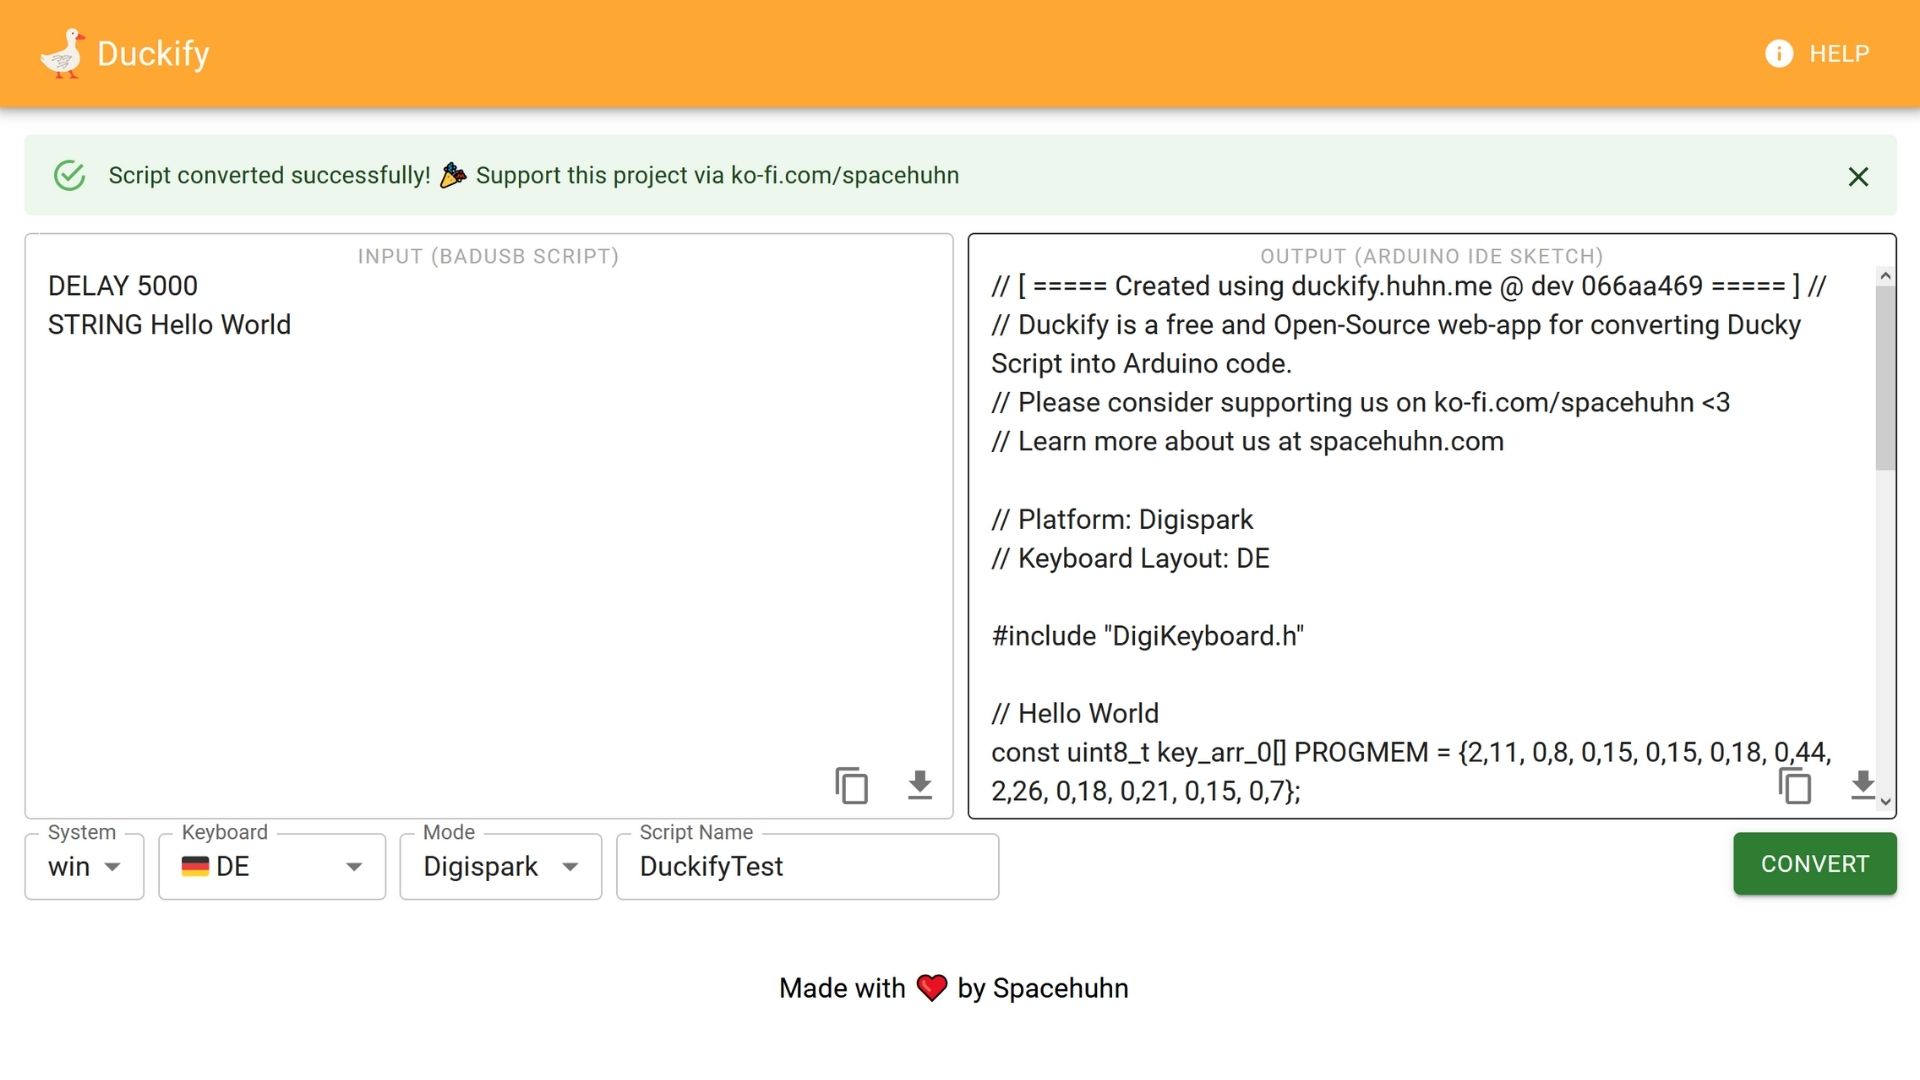
Section titled “Duckify”duckify is a BadUSB script converter tool I made to create Arduino sketches for your Digispark. It takes care of keyboard layouts and allows you to write a simple BadUSB script, which we will explore further in the following sections.
On the left, you enter your BadUSB script, for example:
DELAY 5000STRING Hello WorldAt the bottom, you can set your keyboard system and layout. Then after clicking convert, it generates you an Arduino sketch that you can flash onto your Digispark.
How to avoid macOS Keyboard Setup Assistant
Section titled “How to avoid macOS Keyboard Setup Assistant”Every time you plug in a new keyboard to a mac, this keyboard setup assistant pops up, trying to help you set up your new keyboard. This might be useful for the user, but it can easily break the flow of your script.

To prevent this, you have to make the Digispark appear as an Apple keyboard to the computer because then the Apple machine will recognize it and skip the setup assistant. But to achieve this, you have to manipulate the USB PID (Product ID) and VID (Vendor ID) deep in the Arduino Digispark files:
- In Arduino, open File > Preferences
- Click on the Path at the bottom (it’s a shortcut)
- Open packages > digistump > hardware > avr > 1.7.5 (or other version number) > libraries > DigiKeyboard
- Make a copy of usbconfig.h and call it usbconfig_BACKUP.h in case something goes wrong, and you want to undo the changes
- Open usbconfig.h in a text editor
- Replace the following lines:
#define USB_CFG_VENDOR_ID 0xc0, 0x16to#define USB_CFG_VENDOR_ID 0xAC, 0x05to use 05AC as USB VID which is owned to Apple.#define USB_CFG_DEVICE_ID 0xdb, 0x28to#define USB_CFG_DEVICE_ID 0x50, 0x02to use 0250 as USB PID which is the Apple Aluminium Keyboard with ISO layout.- [Optional] Change
#define USB_CFG_VENDOR_NAME 'd','i','g','i','s','t','u','m','p','.','c','o','m'to#define USB_CFG_VENDOR_NAME 'A','p','p','l','e'and#define USB_CFG_VENDOR_NAME_LEN 13to#define USB_CFG_VENDOR_NAME_LEN 5 - [Optional] Change
#define USB_CFG_DEVICE_NAME 'D','i','g','i','K','e','y'to#define USB_CFG_DEVICE_NAME 'K','e','y','b','o','a','r','d'and#define USB_CFG_DEVICE_NAME_LEN 7to#define USB_CFG_DEVICE_NAME_LEN 7
You can find other USB IDs at https://devicehunt.com/